
Installazione batteria manettini
Guida installazione batteria CR2032 manettini R7
Critical Precautions
Read Before StartingBefore you begin, keep these two rules in mind to avoid damaging the shifter or affecting normal operation.
Mind the Polarity
The system will not power on if the battery is installed backwards. Ensure the "+" symbol on the battery aligns with the polarity mark inside the compartment.
Avoid Over-tightening
The cover screws only need 0.5 N·m of torque. Exceeding this risks cracking the composite housing.
Shifter Battery Installation
CR2032 Coin CellThis guide walks you through installing or replacing the CR2032 coin cell battery in your WHALEROAD R7 shifters. Follow each step carefully to maintain peak shifting performance.
Step-by-Step Installation
Locate the Battery Compartment
The battery compartment is on the side of the shifter body. The illustration below outlines it with a green dashed line.
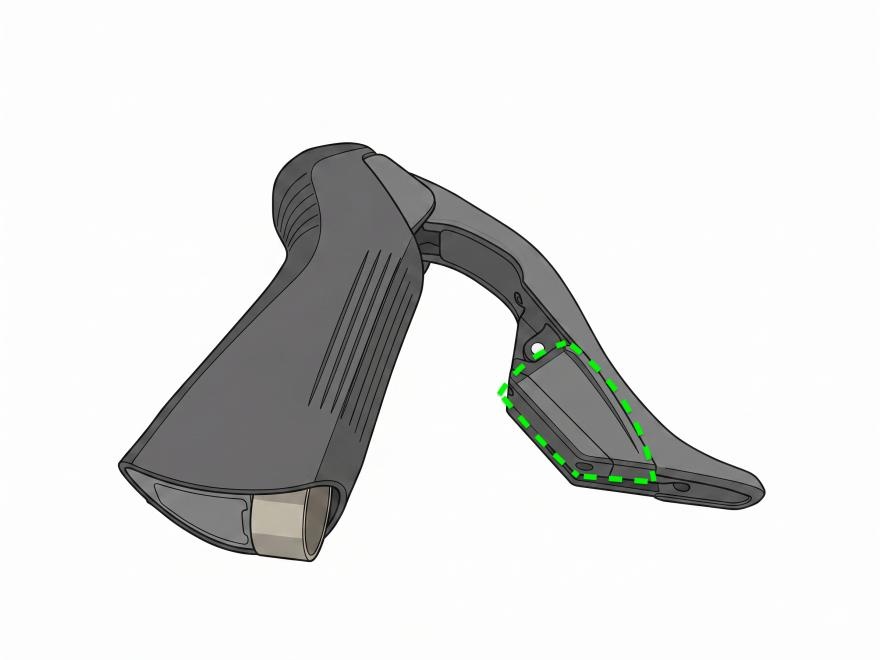
- Find the rectangular cover panel on the side of the shifter.
- The cover is secured by two screws — this is the battery access point.
- Make sure your hands are dry and clean before proceeding.
Remove the Cover
Use a screwdriver to fully loosen both cover screws by turning counter-clockwise. Place the screws and cover on a clean, flat surface where they won't roll away.
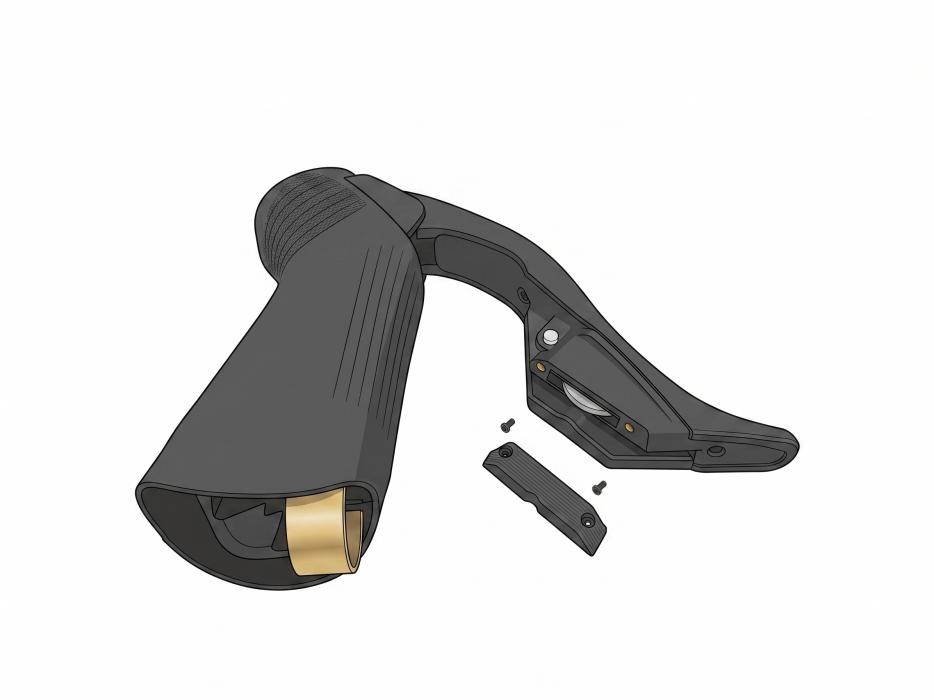
- Use a small tray or dish to keep the screws safe.
- Do not pry the cover open forcefully to avoid damaging the clips.
- Inspect the cover seal for damage or deformation.
Check the Polarity
This step is critical. Visually compare the "+" mark on your new CR2032 battery against the correct side of the compartment.
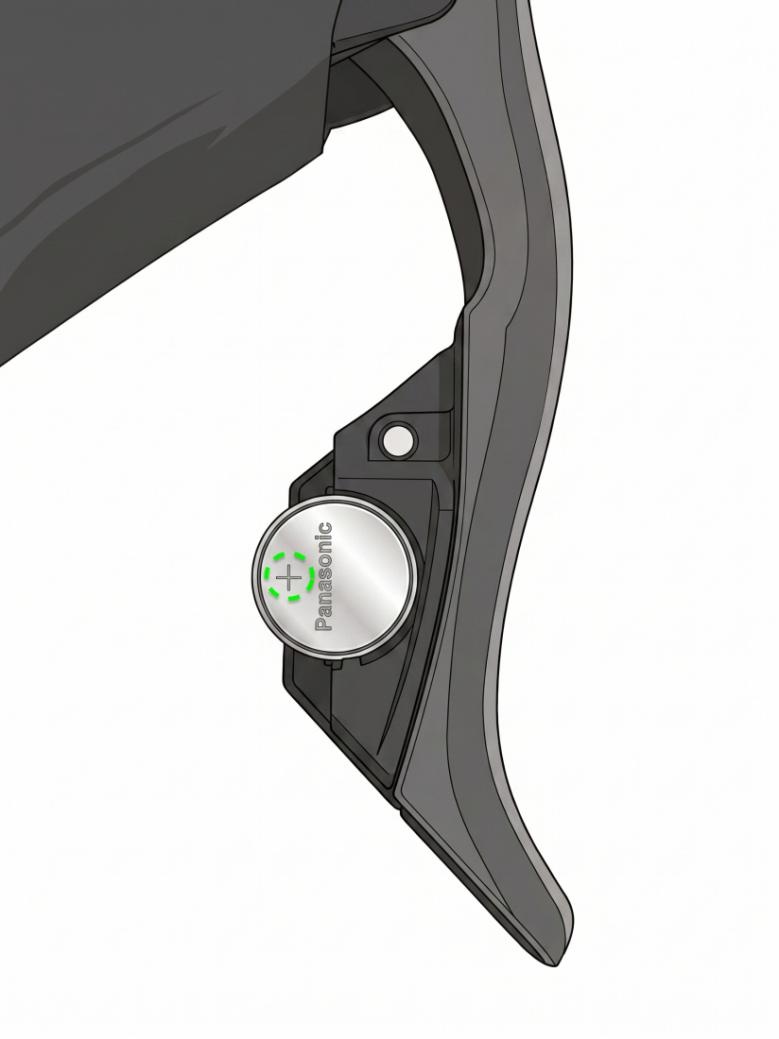
Tip: The CR2032 positive side (with text and + symbol) should face the pairing button / correct side of the compartment, as shown by the green dashed outline above.
Insert the Battery
Slide the new CR2032 into the slot horizontally, with the positive (+) side facing the pairing button side. Press gently until the battery sits flush and fully seated.
- Do not press the center of the battery hard to avoid damaging the contact spring.
- Make sure the battery edge slides into the guide rails without lifting.
- After insertion, gently shake the shifter to confirm the battery is not loose.
Secure the Cover
Align the cover and both screws. Start each screw by hand, then tighten clockwise to 0.5 N·m using a torque wrench. Do not exceed this value.
- Thread both screws by hand first to avoid cross-threading.
- Set your torque wrench to 0.5 N·m.
- Stop as soon as the wrench clicks — do not keep tightening.
Final Check
VerificationAfter installation, run through this checklist to confirm the shifter battery is properly powered.
- Press any shift button and confirm it moves freely.
- Watch the shifter LED indicator and confirm it blinks.
- If the LED does not blink, remove the cover and verify battery polarity.
- Confirm the cover seal is intact and screws are torqued to 0.5 N·m.